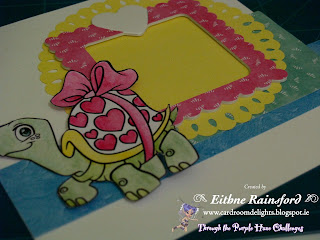
Hello and happy Friday! I am back this week with the step by step, as I mentioned in my previous post. I had aimed for Wednesday to have this out, only that morning I reversed into my gate :( Thankfully nobody was harmed, my car got dented and lights broken, but it took the wind out of me for a few days! I still can't believe how stupid I was!! Anyway... :)
A while back I noticed on Ebay someone was selling a few Martha Stewart punches and We R Memories punches. I have often longingly looked at these, but could never afford them. So my luck was in, when I won the lot. I longed to use them on my projects so I tried my best to use as many as possible this time ;-)
This is the 6 inch scallop punch.
When all 8 punches are complete, this is the result.
I have a bigz Die that I've looked at for a long time, trying to think what I could use it for. With a bit of foam board I cut out the frame, and thought it would work well for a layout/wall hanging piece. So thus my idea was planted in my head what I was going to do!
This is the foam frame covered in some magenta paper from a pack that I have since I started paper crafting. It fitted in perfectly with the challenge at
Through the Purple Haze Challenges - Use up your stash.
This is the beautiful Gerlinde from Encino Stamps, our sponsor this week. I am not a colouring artist by any stretch, and usually struggle with digi's only this beautiful image had no skin tones!! So I could work a little loosely with colours. I usually colour any digi's with watercolour paints, and this one was no exception. I added some glitter to the eye, just for a little sparkle.
Here are all three elements so far, on my 8 x 8" layout. I loved the vibrant colours of the pack, and I am delighted I could copy the colours on Gerlinde.
Some more colours from the paper pack, trying to bring in as much colour as possible :)
With one of the blue strips I got the Martha Stewart border punch and gave the strip a lace effect.
This acted beautifully as a border and layer for the green flower strip.
Me playing around with the layout.
On the frame I stamped in magenta ink, one of my favourite stamps "LOVE LOVE LOVE" (I am a huge Beatles fan, so I especially love using this one!) Although the ink looked beautiful, it is a pigment ink and never dries. So I decided to heat emboss it. I used a Kaleidoscope Transparent embossing powder. It must have been the foam board, because when it heated up, it began to curl a bit but also the colour was awful.
The pink went a bit luminous :(
So I cut out some white card, stamped it, embossed it and this time it turned out better!

.I put a glitter border around the heart to hide the join.
I found some buttons to tone in with the other colours, and loosely arranged them to create a corner.
I stuck a piece of washi tape down (I can never resist!!) With some hearts placed, I decided to jazz them up a little and used some glitter. (it was perfect for hiding a slight blemish on the biggest one!)
Thanks for stopping by and hope you enjoyed the step by step.
Why not head over and check out all the other beautiful projects at Through the Purple Haze Challenges?
Eithne :)


2 comments:
Thanks for the step by step! I have some We R Memory Keepers punches coming and I should be able to do that circle, too!! So excited after seeing your gorgeous card!! Love it!
Hugs
Darcy
Absolutely Gorgeous Eithne x
Post a Comment